The purpose of this project is to create an example of an undergarment for the lower body, called braes, which is reasonably appropriate in terms of patterning, cut, materials, and assembly techniques for the late twelfth century. There are numerous challenges in this effort, principally the fact that there are no surviving examples which I am aware of until the fifteenth century. In lieu of that type of direct source, I have used artistic representations and surviving items from the late twelfth century to design and construct a garment which fits the appearance and function of the original garments.

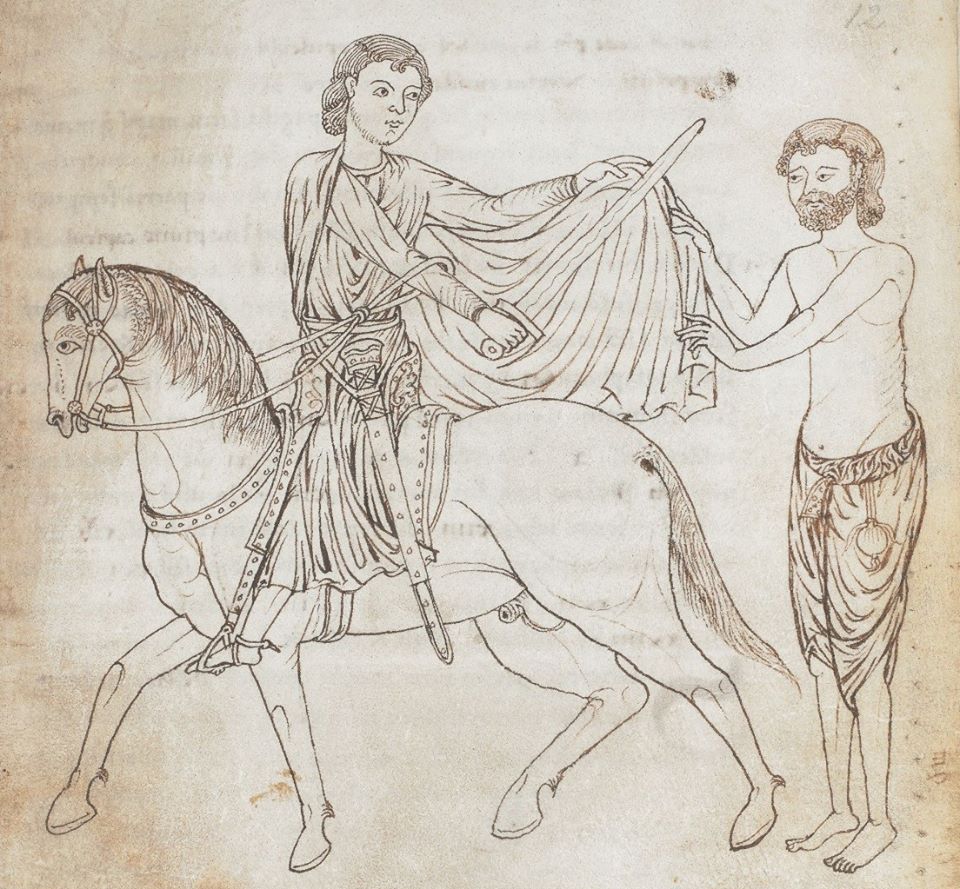
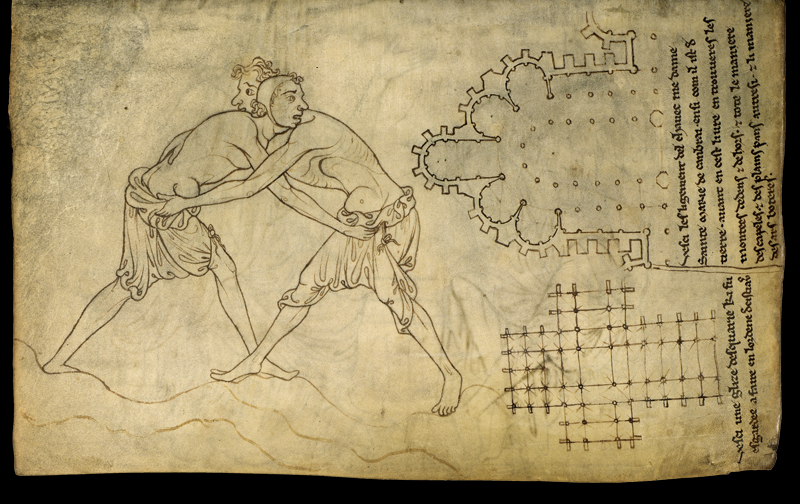
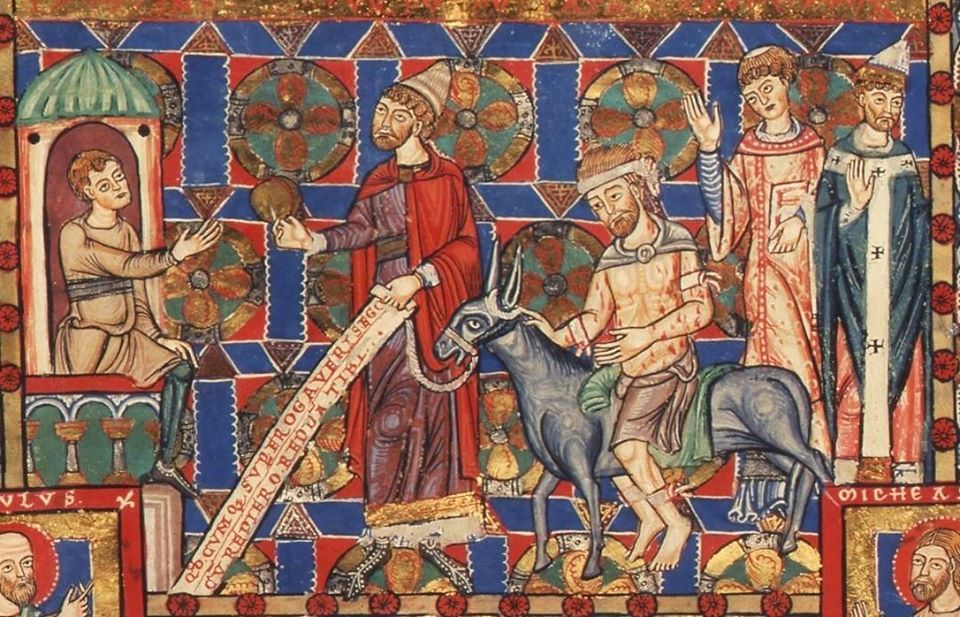
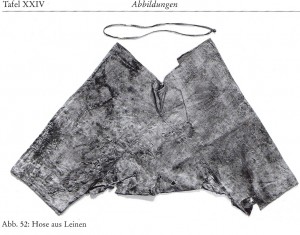
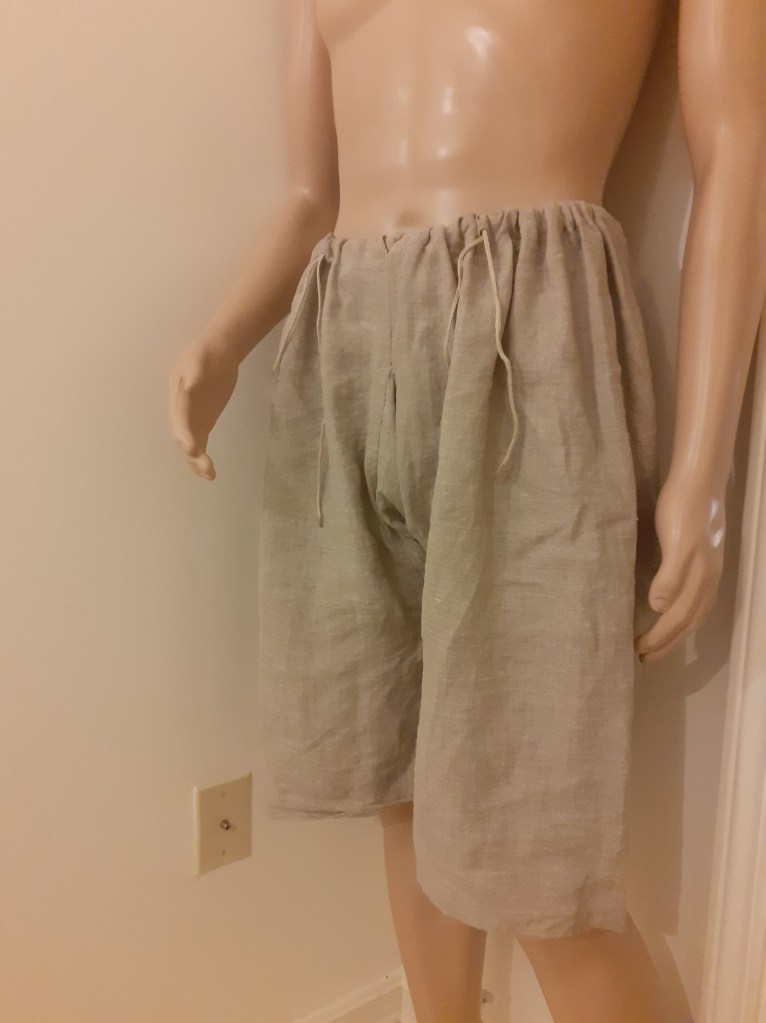
The best information I am aware of about braes of twelfth century comes from illustrations. The item depicted is invariably colored white or taupe in color, is baggy around the legs and groin, and has a considerable amount of gathering around the waist. The legs come down to the knees or just below the knees and in several examples appear to be loose at the bottom, creating two flaps at the lower thigh.(Figure 1) This feature seems to be replaced by a different style as the 13th century goes on, with the outsides of the thighs being pulled upwards, seemingly by a different pattern and sometimes by cords attached at the waist. (Figures 2, 4, 5)
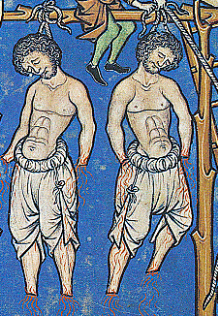
The groin is almost always shown with many folds and wrinkles radiating upwards and linking with the numerous folds caused by the gathering of the waist. In a single period illustration from the turn of the 13th century Flanders I have found a representation of a drawstring coming out from the front of a pair of braes.(Figure 2). Another image from the middle of the 12th century in Germany shows a pair of hosen with a drawstring which is not entirely enclosed by the waistband.(Figure 3) Does this suggest an additional style? I have never seen any other evidence of this sort of undergarment, but it it possible. For the sake of brevity, I will only say “maybe” and move on.

A further detail we can glean from illuminations is that the next layer of garments, hosen, were attached to the braes. In this context, hosen were long single legged stockings made of wool or silk which were made so that the upper edge came to a point at the wearer’s waist or hip and where it attached to the braes, sharing the undergarment’s support mechanism. The precise method of attachment is uncertain, but a few illuminations show braes with cords hanging from the waistline.(Figures 4, 5) I interpret this as cords passing through the braes’ waistband, over the drawstring, and back out the waistband. For the purpose of this document, I will leave the explanation there. The subject of hosen attachment methods will be covered in the hosen documentation.
Underwear was not a popular subject for writing in the medieval period. The best I have been able to produce is a small list of documents which state what material an undertunic should be constructed of. Since braes are also worn under the clothing and against the skin, I think it is reasonable to assume that the undertunic and braes would be constructed of the same material. In this case, I am using linen. This topic is discussed in detail in my post “Undergarments 1: Undertunic”.
In order to function, the garment needs two sets of cords. First, drawstring which holds up the braes themselves. Second, they need a pair of cords which the hosen will be attached to. The drawstring needs to be strong and comfortable to the wearer, the hosen strings need to be slender and strong, and the garment needs to be designed for the two sets of cords to interface. The two options for a waistband are for a piece of material to be purpose made or for an off-cut to be used. Because of the baggy nature of the garment, the waistband must have considerable length. A waistband cut from regular cloth could be cut with the grain or on the bias. A bias-cut waistband made to the same measurement as the pattern I ended up with, it would be approximately 132cm long. Cut to a 45 degree angle, this bias material would need to be cut out of a loom width of 93cm or multiple pieces joined together. A bias cut waistband takes up a lot of material and potentially causes significant wastage. Bias cut material would also be significantly weaker than grain-cut material because none of the fibers would run the length of the entire band.
A grain cut waistband would be stronger than bias cut, but provide less elasticity. While there is less potential for wasted material, a waistband which is cut out of the loom’s width with the warp running the length of the piece eats up a fairly significant portion of the loom width. In either case, a waistband which is folded over to create a band which is both relatively strong and wide enough to be comfortable for the user would take a strip of cloth at least five centimeters wide. All of these aspect combine to illustrate that a waistband cut from a regular piece of cloth would not be ideal in this instance.
A purpose made drawstring might take the form of tablet weaving, the technique that I chose for this project. A tablet woven drawstring creates negligible waste, is strong, somewhat elastic, thick enough to provide some comfort. I am not aware of any direct usage of tablet woven material being used for this purpose, but it is a technique used from at least the 1st century CE through the 15th century and beyond, and it fits all of my other criteria.(Crowfoot 130-132) Rather than using any sort of decorative pattern, I have used a wool yarn which is the natural gray of the sheep with a simple all forward and all back card turning pattern. As this is an undergarment and I do not portray an affluent person, I believe this is most appropriate.
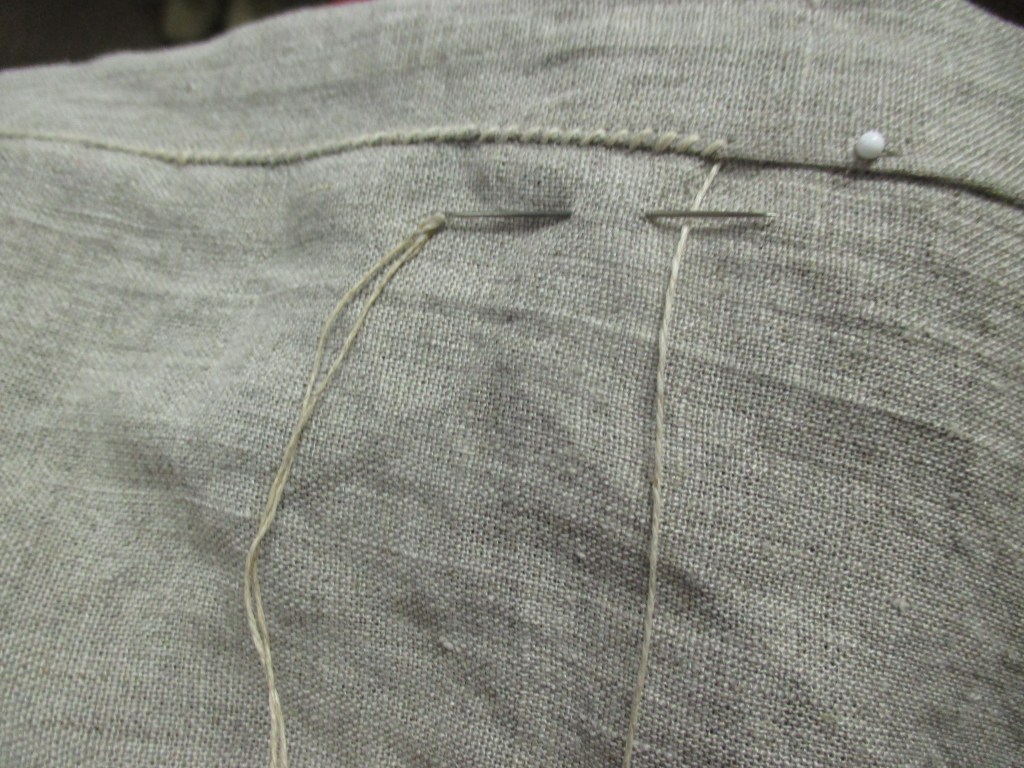
There are fewer options for hosen cords. The primary type of cordage excavated in my context and near to my context in the sources I have available is seven loop finger braiding.(Crowfoot 135) This is the technique I used. Linen or hemp could be used due to a resistance to stretching. I chose the former due to availability. Just as the drawstring was left natural from the fiber source, the linen was in an unbleached and undyed state. I finished each piece of cordage by running it across a piece of beeswax. This sufficiently seals the fibers together and does not meaningfully increase the diameter of the cordage, which is important for tying and untying the hosen.
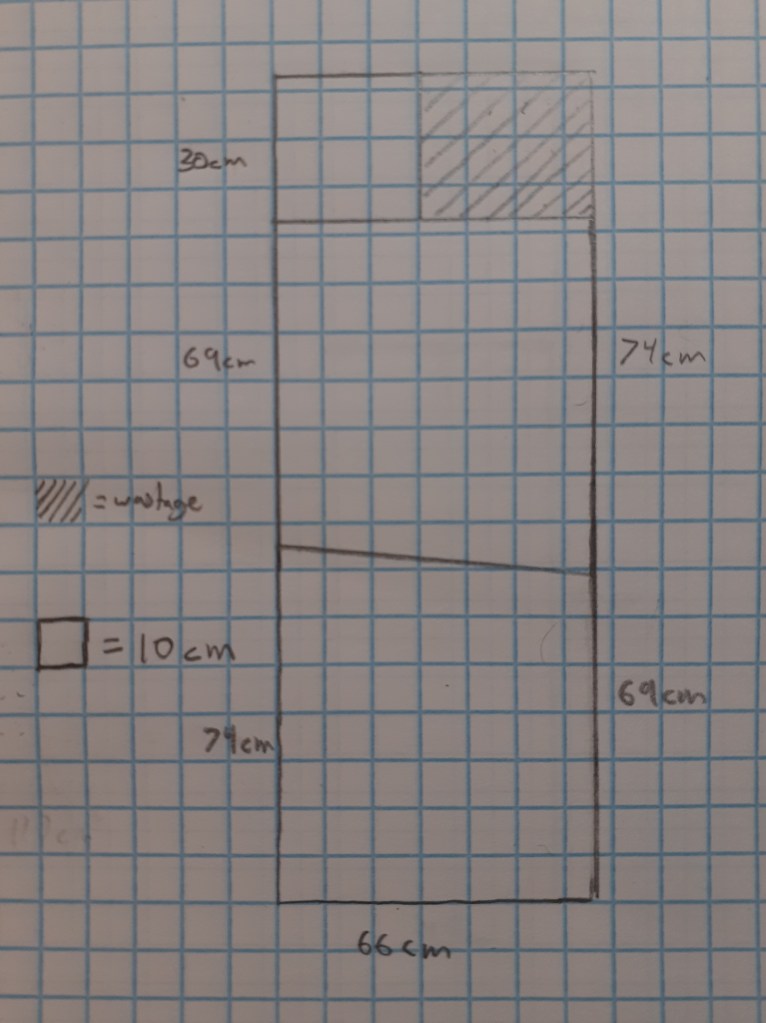
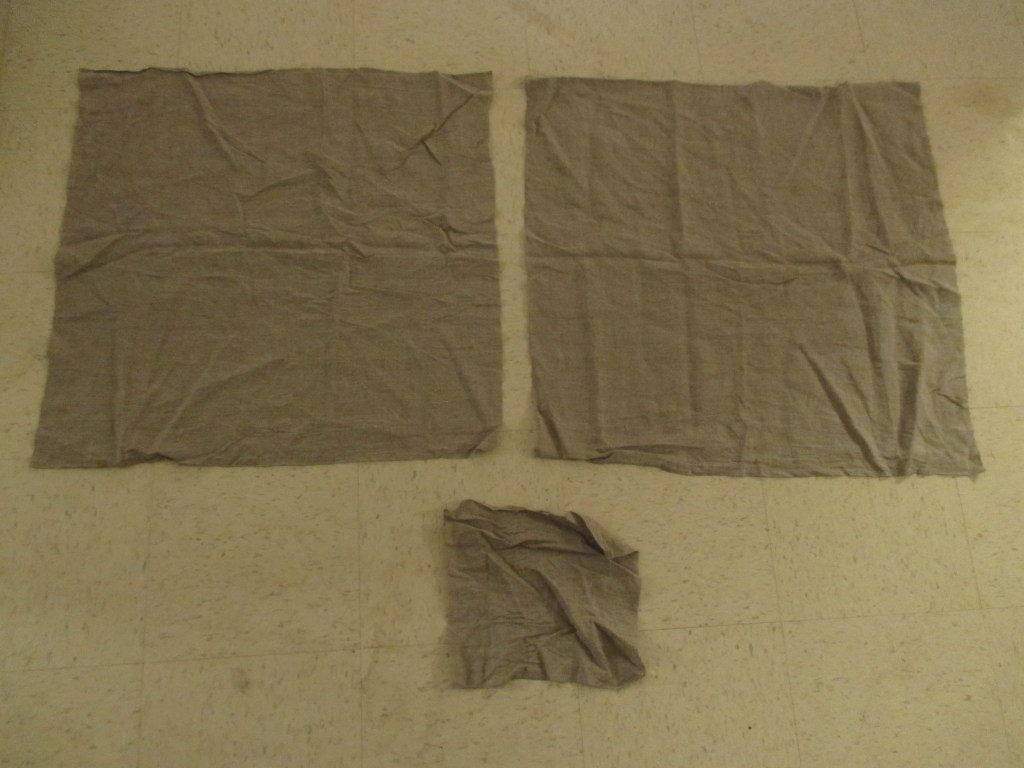
Patterns of the late twelfth century and early thirteenth century started to incorporate some curves to the piecing, especially to improve the fit. Contrary to fitted outer garments, the appearance of braes in artwork is both wrinkled and baggy, so I decided to stick with a very angular cut, saving as much material as possible. In order to match the look of the period illustrations, I designed the pattern with leg pieces which were oversized and added a square gusset in the middle which is turned on the bias. The resulting diamond shape gives ample mobility and creates the characteristic wrinkles. Previous iterations of this garment have resulted in the back of the garment riding up the seat, especially during athletic activities. To account for this, I designed the back to be five centimeters higher than the front. This drops the whole back side of the garment, bringing it away from the wearer’s seat and prevents the undesired effect.
After completing the project, I discovered that there is an extant example of an undergarment dating to the 8th or 9th century Balkans which follows the pattern I made almost exactly.(Figure 8) While I found out about it too late to directly tie in to this project, the fact that historical people came up with essentially the same pattern when facing the same problems is reassuring.
For my fabric I chose a tabby weave linen in a medium weight. The selvages from this machine woven cloth included warp threads which were a different color than the others, and the type of selvage was not known in period, so I cut them away whenever they were encountered.
Just as in my previous post about linen garments, “Undergarments 1: Undertunic”, I used a flat felled seam for construction of the garment. Since writing that post, additional research has come to light to support that decision. The surviving “Chemise de saint Louis”(1214-1270) and “Aube de sante Claire”(1253) were both constructed with flat felled seams.(Anderlini 42-43) Because of this, I think I am more than justified in continuing to use the seam technique. Hems of the garment were also folded twice before being stitched down with a felling stitch. The particular assembly of the garment and seams used meant that some seams wanted to be folded outwards rather than inwards. As this is an undergarment, I reasoned that outward appearance was less important than proper seam ordering, and felled the seams as they wished.(Figure 10)
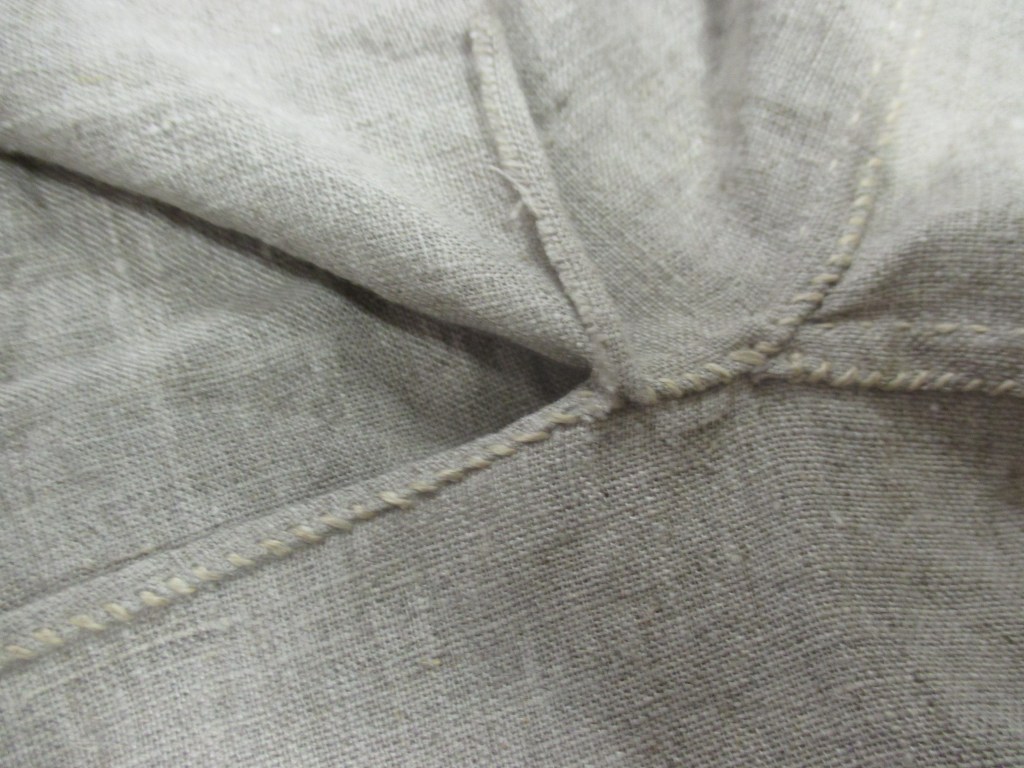
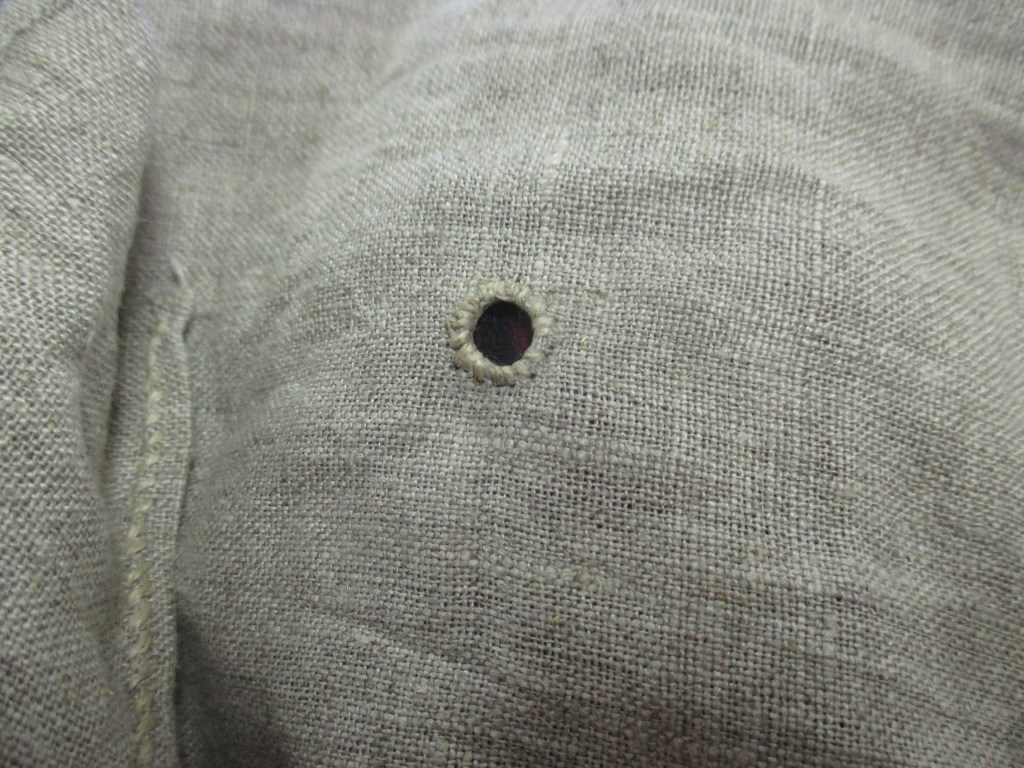
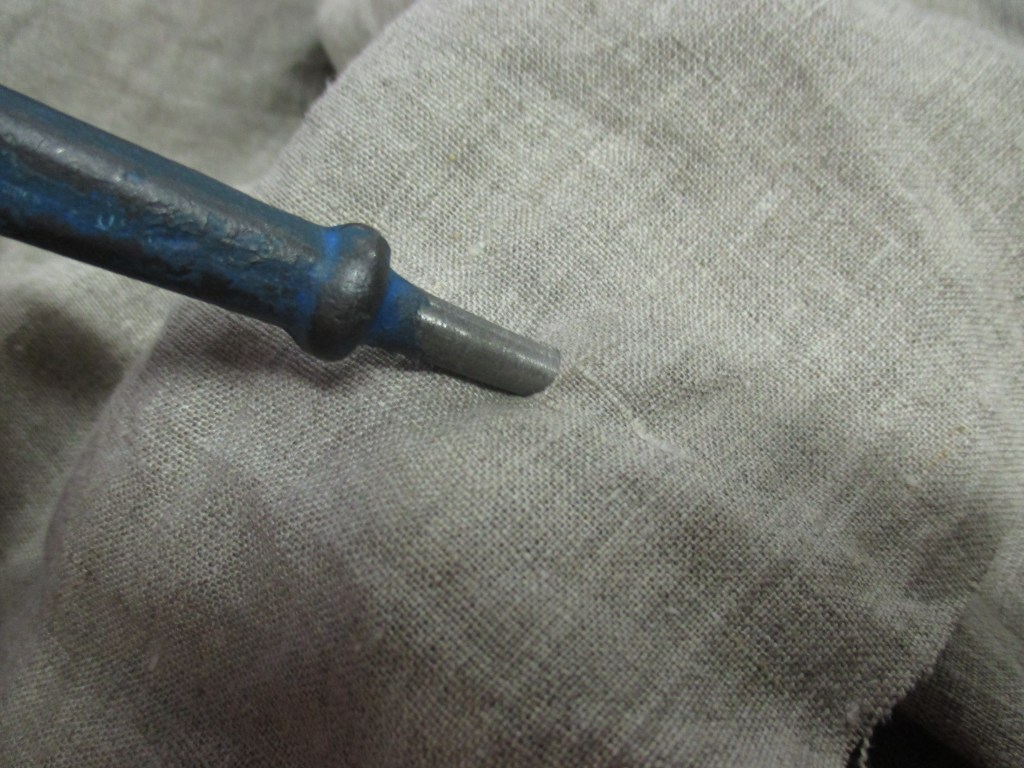
The three pattern pieces were assembled first, ensuring to leave the inside and bottom of each leg open as indicated in the period illustrations and carvings as well as a small gap at the top and front of the garment. This allows access to the drawstring. Once the legs and gusset were attached together and seamed, I proceeded to the hosen cord holes. To facilitate this, I essentially made an eyelet. I used an awl to spread the linen fibers before circling the hole with a buttonhole stitch.(Figures 11, 12)
With the hosen cord holes finished, I folded over the waistband and stitched it down with a felling stitch.
Once the waistband was done, there were only the simple tasks of weaving the drawstring and braiding the braes cords as I have already described. As of writing, the drawstring is a couple inches longer than the waist of the braes, though I may cut it down to get rid of unused material.

In all, I think this example fulfills my objective of adhering to the patterning style of the twelfth century, matching the aesthetic of the available period artwork, will do its job in suspending the next layer of clothing, and provides a good measure of mobility and comfort to the wearer.
Bibliography
Anderlini, Tina, and Beryl-Alexandra Brard. Le Costume médiéval Au XIIIe siècle: (1180-1320). Heimdal, 2014.
Crowfoot, Elisabeth, et al. Textiles and Clothing C.1150-C.1450. Boydell Press, 2016.
Lanteigne, Benjamin A. “Getulio’s Workshop.” Getulio’s Workshop, 27 Jan. 2020, https://getuliosworkshop.com/2020/01/27/undergarments-1-undertunic/.

This is great!
I also went with a very similar design for my braies. I drew Inspiration from the same Slavic garment.
I used 100 year old nettle canvas rather than linen, though. The only thing that is linen in mine is the sewing threads.
I used a simple four-strand Woolen round braid rather than a tablet woven band for my drawstring.
The ties for my hose are simple two-ply twisted nettle string. I haven’t noticed any stretching yet despite being two-ply.
LikeLike
The thing with nettle is that it is a very similar bast fiber to linen and hemp and it is not standard practice for archeologists to differentiate between them. Even with the heirloom linen that may be labeled you are talking about, I am never 100% sure that the fiber is one bast fiber or another. Literary references aren’t reliable either, because linen may be used as a generic term.
LikeLike